


Configuring the Nginx proxy server
This will describe the process of installing and configuring Nginx on Ubuntu 22.04 to connect the website 'online store' to the global network.
Step 1 — Creating a domain name
A domain name is a unique address used to identify a website on the Internet. It serves as a human-readable substitute pointer for an IP address, which is a numerical identifier for the servers that store website data.
Example domain names: example.com, example.net
The structure of the domain name consists of several parts:
    1. Top-level domain (TLD): These are the last segments of a domain name, such as .com, .org, .net, etc.
     2. Second-level domain: This is the actual name of the site, for example, example in example.com.
     3. Subdomains (if any): They come before the second level, for example, www in www.example.com.
The domain name must be unique and is registered with special organizations known as domain name registrars.
If you do not yet have a domain name that will identify your store, you can purchase one from a domain registration organization. You can easily find these organizations on the internet; payment for the domain name is calculated for 1 year. The price will depend on the domain name you choose.
Step 2 — Linking the domain name to the IP address of your computer
After you have set up your server, which can be either a home computer with a dedicated IP address or a cloud server, you need to link your server's IP address with a domain name. In the domain name settings, in the environment where you purchased the domain name, you need to specify a number of parameters.
Some cloud services such as:
DigitalOcean
allow obtaining these parameters from the cloud services themselves for linking the domain name.
If you are using a home computer with a dedicated IP address, or cloud services that provide only external IP addresses, then to link your IP address with a domain name, you need to use additional services such as:
cloudflare
After you have made the binding elements of your IP address, which the domain name will refer to, it may take up to two days. This is because these parameters must take effect on different servers, but usually this process is faster.
Step 3 — Installing Nginx on Ubuntu 22.04
After you have linked your domain name to the IP address of your server, you can proceed with the installation and configuration of Nginx. We will need the domain name for the final configuration of Nginx.
Information taken from the source DigitalOcean
Nginx is one of the most popular web servers in the world, responsible for hosting some of the largest and most visited websites on the Internet. It is a lightweight choice that can be used as a web server or a reverse proxy server.
First, you need to update the packages:
sudo apt update
After that, we can install Nginx:
sudo apt install nginx
Press Y when prompted to confirm the installation. If you are prompted to restart any services, press ENTER to accept the default values and continue. apt will install Nginx and all necessary dependencies on your server.
Step 4 — Configuring the firewall
If a firewall is installed on your server, you can check it with the following command:
sudo ufw status
If UFW is installed, you will see information about the current state of the firewall. If UFW is not installed, you will receive an error message. If you do not have a firewall installed, you can skip this step. Alternatively, you can install a firewall, as you will need it in the future to protect your server. The only thing to remember after installing the firewall, if you are connected remotely to your server, is to ensure that you have opened access in the firewall for your remote connection, so as not to lose connection with your server.
If the UFW firewall is not installed, install it with the command:
sudo apt install ufw
To avoid losing the connection after activating UFW, first allow incoming connections over SSH (port 22):
sudo ufw allow ssh
Now you can enable UFW:
sudo ufw enable
Before testing Nginx, you need to configure the firewall software to allow access to the service. Nginx is registered as a ufw service upon installation, which simplifies granting access to Nginx.
List the application configurations that can work with ufw by entering:
sudo ufw app list
You should receive a list of application profiles:
Output
Available applications:
  Nginx Full
  Nginx HTTP
  Nginx HTTPS
  OpenSSH
-As can be seen from the output, there are three profiles available for Nginx: Nginx Full: this profile opens both port 80 (regular, unencrypted web traffic) and port 443 (encrypted TLS/SSL traffic) Nginx HTTP: this profile opens only port 80 (regular, unencrypted web traffic) Nginx HTTPS: this profile opens only port 443 (encrypted TLS/SSL traffic)
It is recommended to enable the strictest profile that will still allow the traffic you have configured. Now we will need to allow traffic only on port 80.
You can enable this by entering:
sudo ufw allow 'Nginx HTTP'
You can check the change by entering:
sudo ufw status
The output will indicate which HTTP traffic is allowed by the UFW firewall:
Output
Status: active

To                         Action      From
--                         ------      ----
OpenSSH                    ALLOW       Anywhere
Nginx HTTP                 ALLOW       Anywhere
OpenSSH (v6)               ALLOW       Anywhere (v6)
Nginx HTTP (v6)            ALLOW       Anywhere (v6)
Step 5 – Checking your web server
At the end of the Ubuntu 22.04 installation process, Nginx is started. The web server should already be running.
We can check whether the service is running using the systemd initialization system by entering:
systemctl status nginx
In the case of a successful start of Nginx, it should show active (running):
Output
● nginx.service - A high performance web server and a reverse proxy server
   Loaded: loaded (/lib/systemd/system/nginx.service; enabled; vendor preset: enabled)
   Active: active (running) since Fri 2022-03-01 16:08:19 UTC; 3 days ago
     Docs: man:nginx(8)
 Main PID: 2369 (nginx)
    Tasks: 2 (limit: 1153)
   Memory: 3.5M
   CGroup: /system.slice/nginx.service
           ├─2369 nginx: master process /usr/sbin/nginx -g daemon on; master_process on;
           └─2380 nginx: worker process
As confirmed by this, the service has started successfully. However, the best way to verify this is to actually request a page from Nginx.
You can access the default Nginx landing page to ensure that the software is working correctly by navigating to your server's IP address:
http://your_server_ip
To find out the IP address of your server, if it is still unknown to you, you can execute the command:
hostname -I
After executing the command hostname -I, a list of IP addresses of your computer will appear, the first one should be the primary:
192.168.64.128 172.17.0.1 172.19.0.1 172.20.0.1 172.18.0.1
-The number of IP addresses and their values may be different for you.
Having learned the IP address of your server, enter it in the browser's address bar:
http://your_server_ip
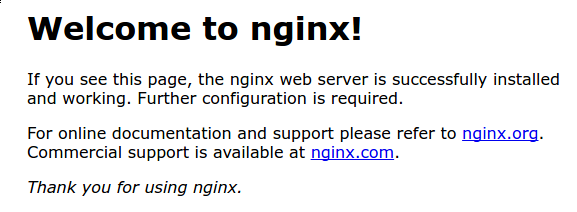
You should receive the default Nginx target page:
Commands that may be useful for managing Nginx (for information)
To stop the web server, enter:
sudo systemctl stop nginx
To start the web server when it is stopped, enter:
sudo systemctl start nginx
If you are just making changes to the configuration, Nginx can often reload without dropping connections. To do this, enter:
sudo systemctl reload nginx
By default, Nginx is configured to start automatically when the server boots. If this is not what you need, you can disable this behavior by entering:
sudo systemctl disable nginx
To re-enable the service startup at boot, enter:
sudo systemctl enable nginx
Step 6 – Primary configuration of the domain name (mandatory if you have a domain name)
Your domain name will be configured as a server block.
When using the Nginx web server, server blocks (similar to virtual hosts in Apache) can be used to encapsulate configuration details and host more than one domain from a single server. We will set up the domain with the name
your_domain
, but you should
replace it with your own domain name.
You need to complete the entire process described below, and only at the very end of the domain name configuration will we connect our application "online store" on port 5000 to our domain name.
Nginx on Ubuntu 22.04 has one default server block enabled, which is configured to serve documents from the directory at /var/www/html. While this works well for a single site, it can become cumbersome if you host multiple sites. Instead of changing /var/www/html, let's create a directory structure within /var/www for our site your_domain, leaving /var/www/html as the default directory that will be served if the client's request does not match any other site.
Next, create a directory for your_domain (remember to replace your_domain with the name of your actual domain) as follows, using the -p flag to create any necessary parent directories:
sudo mkdir -p /var/www/your_domain/html
Then assign ownership of the directory using the $USER environment variable:
sudo chown -R $USER:$USER /var/www/your_domain/html
The permissions of your root websites should be correct if you have not changed your umask value, which sets the default file permissions. To ensure that your permissions are correct and allow the owner to read, write, and execute files, while providing only read and execute permissions to groups and others, you can enter the following command:
sudo chmod -R 755 /var/www/your_domain
Next, create a sample index.html page using nano, your favorite editor. This page is temporarily created to check the domain name settings; later we will switch it to our "online store":
nano /var/www/your_domain/html/index.html
Inside, add the following HTML example:
<html>
    <head>
        <title>Welcome to your_domain!</title>
    </head>
    <body>
        <h1>Success! The your_domain server block is working!</h1>
    </body>
</html>
Save and close the file. There are two ways. 1. Press Ctrl + O, then Enter; this will save the changes. To exit, press Ctrl + X. 2. By pressing Ctrl + X to exit, and then when prompted to save, choose Y and press Enter.
In order for Nginx to serve this content, it is necessary to create a server block with the correct directives. Instead of directly modifying the default configuration file, let's create a new file at: /etc/nginx/sites-available/your_domain
sudo nano /etc/nginx/sites-available/your_domain
Insert the following configuration block, which is similar to the default block but updated for our new directory and domain name:
server {
        listen 80;
        listen [::]:80;

        root /var/www/your_domain/html;
        index index.html index.htm index.nginx-debian.html;

        server_name your_domain www.your_domain;

        location / {
                try_files $uri $uri/ =404;
        }
}
Save and close the file. There are two ways. 1. Press Ctrl + O, then Enter; this will save the changes. To exit, press Ctrl + X. 2. By pressing Ctrl + X to exit, and then when prompted to save, choose Y and press Enter.
Next, let's enable the file by creating a link to the sites-enabled directory, from which Nginx reads data during startup:
sudo ln -s /etc/nginx/sites-available/your_domain /etc/nginx/sites-enabled/
To avoid a potential memory issue with the hash container that may arise when adding additional server names, it is necessary to adjust one value in the /etc/nginx/nginx.conf file. Open the file:
sudo nano /etc/nginx/nginx.conf
Find the server_names_hash_bucket_size directive and remove the # symbol to uncomment the line.
...
http {
    ...
    server_names_hash_bucket_size 64;
    ...
}
...
Save and close the file. There are two ways. 1. Press Ctrl + O, then Enter; this will save the changes. To exit, press Ctrl + X. 2. By pressing Ctrl + X to exit, and then when prompted to save, choose Y and press Enter.
Note: Commenting out lines of code—typically by placing a # at the beginning of the line—is another way to disable them without actually deleting them. Many configuration files come with several commented-out options, allowing them to be enabled or disabled by toggling them between active code and documentation.
Next, check for any syntax errors in the Nginx files:
sudo nginx -t
If there are no issues, restart Nginx for the changes to take effect:
sudo systemctl restart nginx
Now Nginx should serve your domain name. You can verify this by going to http://your_domain, where you should see something like this:
http://your_domain
